How to not burn your LEDs!
Before we go into electronics, here is what will happen when if you do not handle them well.
Some essentials…
In your SSTunino kit, we have provided some components for you to use, and is listed inside the parts list page. Note: If there are any components missing from the kit when you first recieve it, please approach your ICT teachers.
This tutorial will cover the details of the components that are included in the SSTuino Kit, along with some theory behind electronics to help you to build your first circuit in the meantime. This tutorial page is very useful as you can reference to the components in the event you forget what it is.
Table of Contents
- SSTuino Board
- USB C to Micro USB Cable
- CP2102 MicroUSB Serial Converter
- ESP01S WiFi Chip
- The Resistor
- Light Emitting Diode (LED)
- Breadboard
- Wires
- Push Button
- Light Dependant Resistor
- Buzzer
- Potentiometer
- Ultrasonic Sensor
- TMP36 Temperature Sensor
- PIR Proximity Sensor
- DHT11 Temperature and Humidity Sensor
- Servo
- RGB LEDs
- Last but not least
SSTuino Board
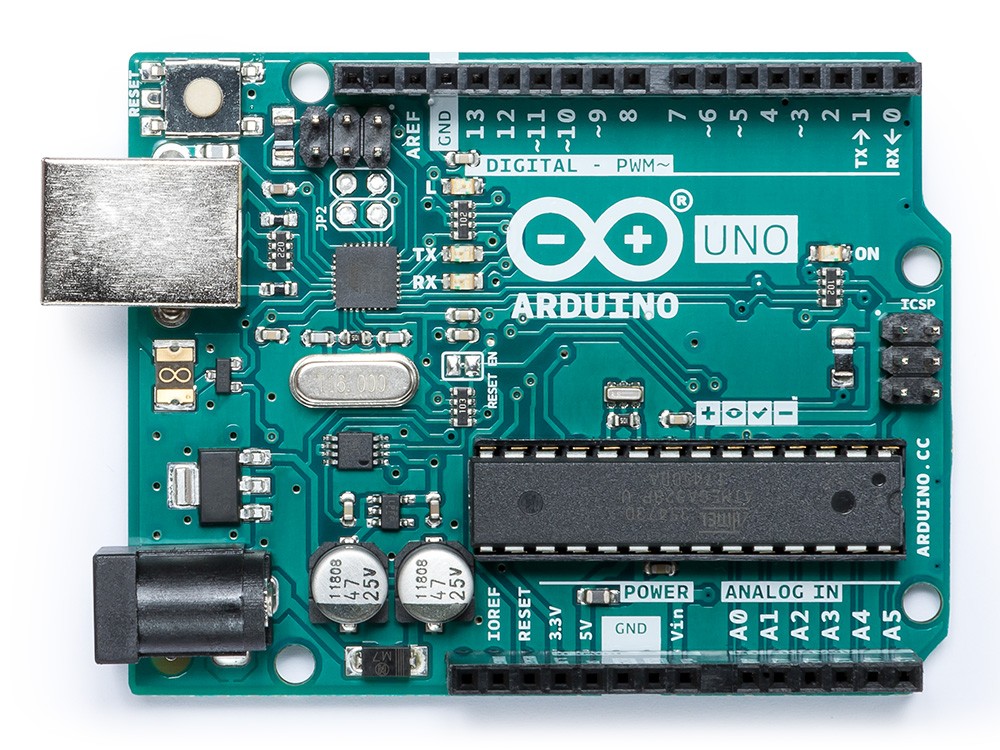
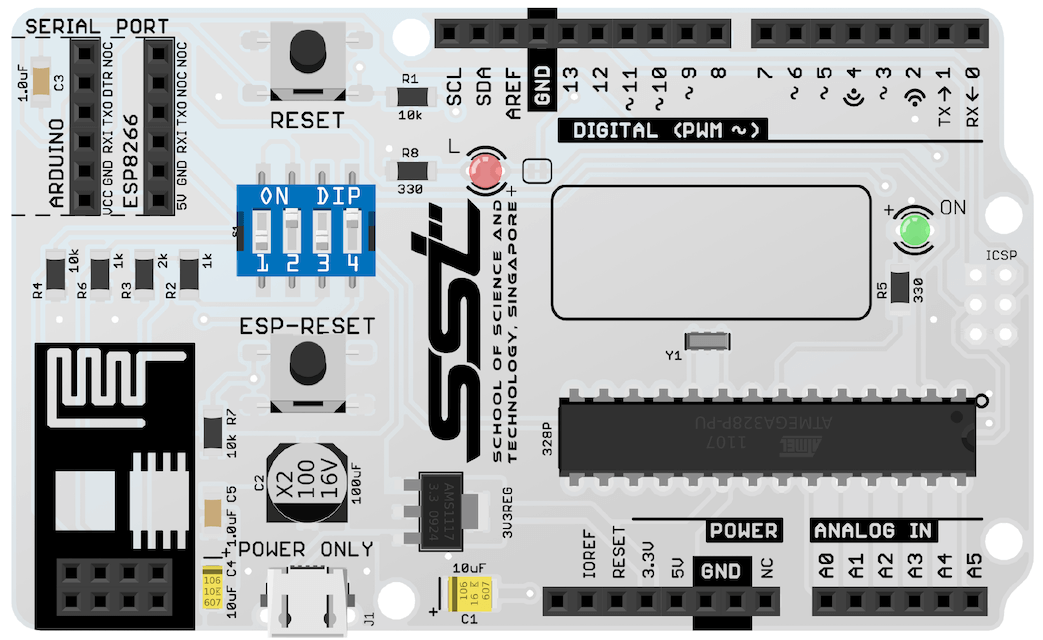
Notice any difference?
For students who are familliar with the Arduino UNO, you would realise that it looks pretty simillar to the SSTuino. This is because that the SSTuino is an adapted design from the Arduino UNO. This device shares a lot of similarities as the UNO such as:
- Coding compatability
- Shield compatability as the SSTuino shares the same I/O Pins as the Arduino Uno
- Sharing the most of the same components
The major design difference with this board is that it has a extended board footprint to accept a WiFi chip, resulting the SSTuino to be an Internet-Of-Things (IoT) enabled product. This means that the SSTuino can connect to the internet to send/recieve data!
USB C to Micro USB Cable
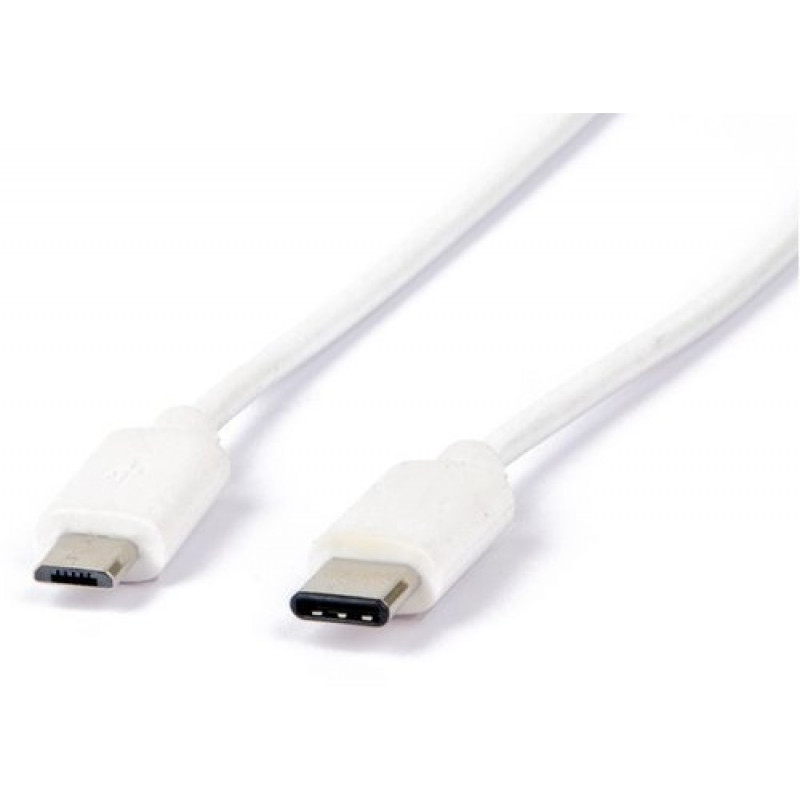
The USB C to Micro USB Cable is a unique cable that helps you connect your USB C Mac to the CP2102 MicroUSB Serial Converter. As this type of cable is less commonly seen in the market, please take good care of this wire as it is not easy to obtain one.
NEU (New Enhanced UART) CP2102
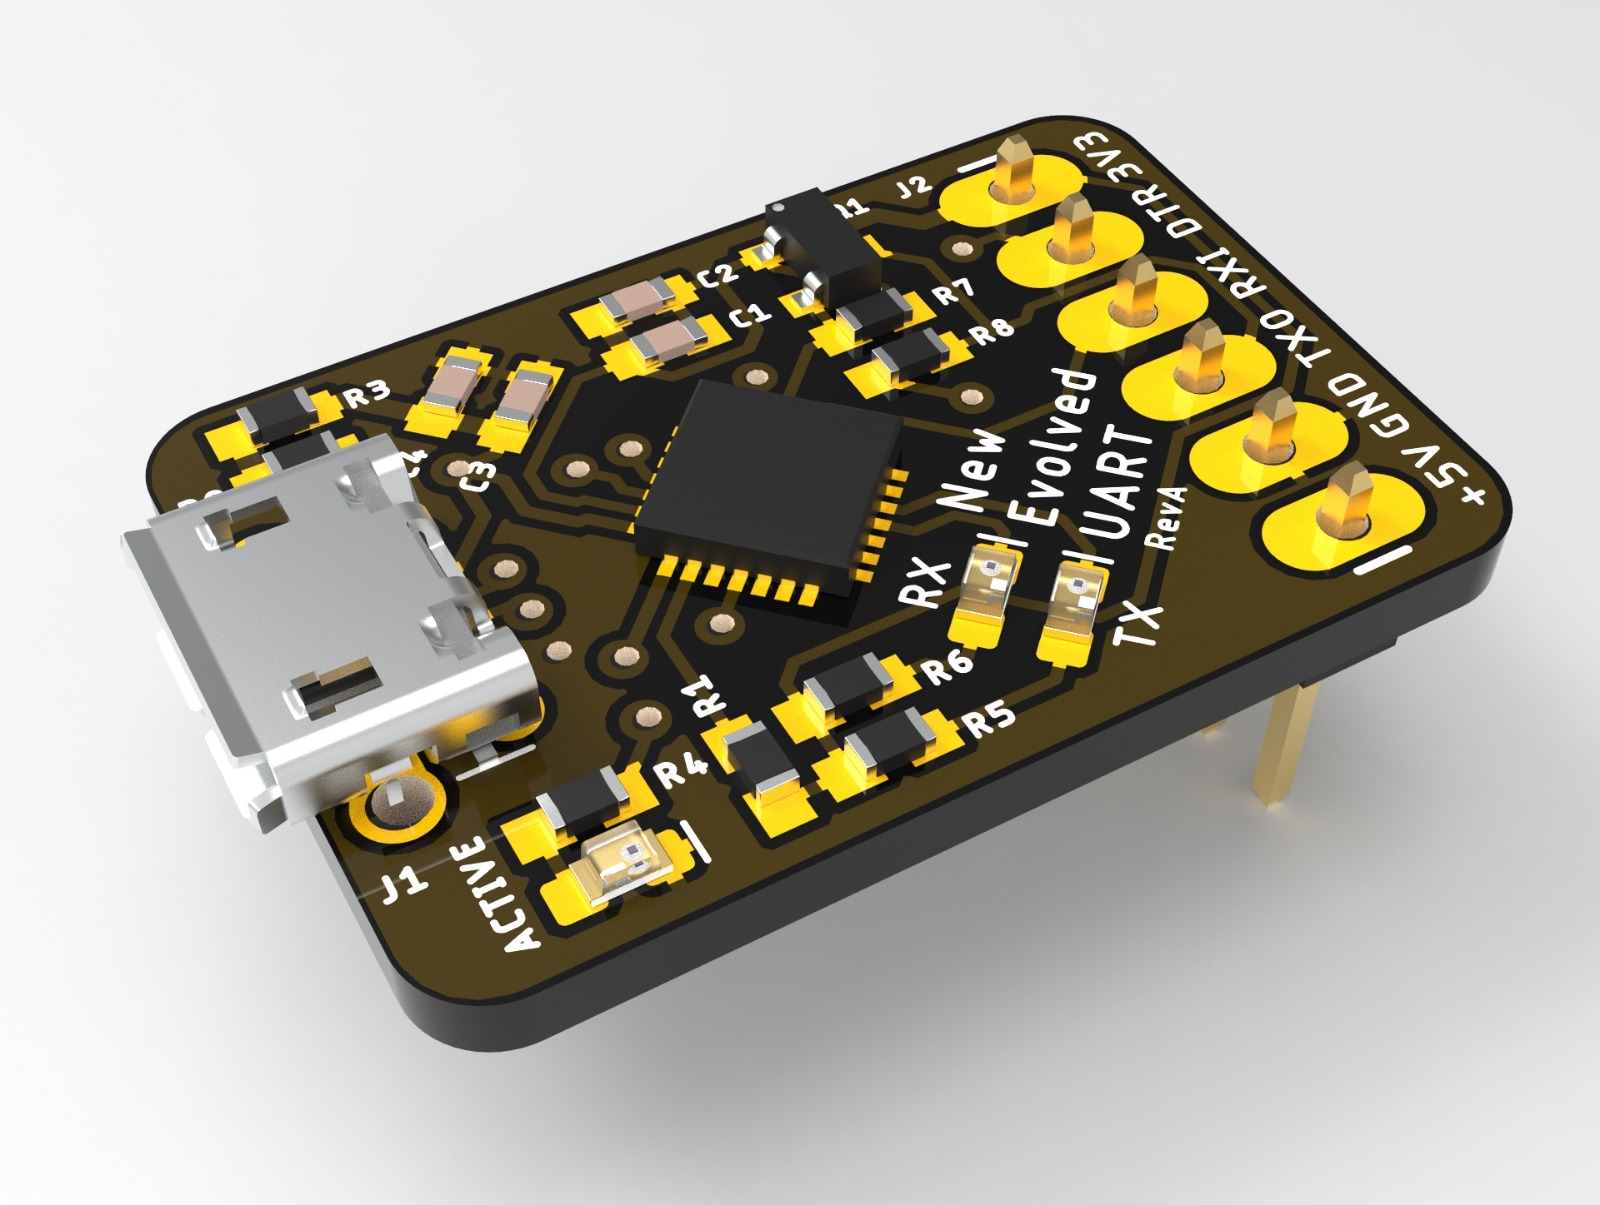
The CP2102 MicroUSB Serial Converter is a very important device to have as it is the communication tool between the computer and the microcontroller (SSTuino). We designed SSTuino to have a external Serial Converter as not only is it modular, where you could change the chip in the event it is spoilt, you could also use the CP2102 to communicate with other serial devices such as the ATTiny85 or the Raspberry Pi.
This is where you would use your USB C to Micro USB cable to plug into this chip for uploading of code from your computer to the SSTuino.
The NEU (New Enhanced UART) is a custom designed serial converter designed by Pan Ziyue for the SSTuino Innovator’s Kit, and is designed to work with your Mac and SSTuino. As there are limited production quantities in each run, please refrain from losing the chip. Moreover each chip is expensive to manufacture so again please take good care of the chip.
ESP01S WiFi Chip

The ESP01S WiFi Chip is what sets the SSTuino different from the Arduino UNO. It allows the SSTuino to be able to connect to the internet, allowing the SSTuino to have smart home, automation and internet connected sensor abilities.
Our team is developing more content to help you get started in developing IoT products, so do watch this space for more details.
The resistor
Ohms Law
For a more detailed read, click here
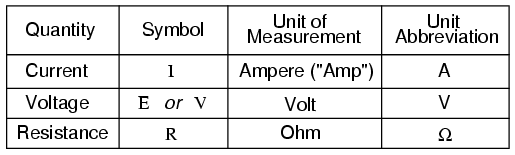
Ohm’s Law is the most basic relationship between voltage, current and resistance. A circuit is formed when there is a conductive path for electric charge to move.
The movement of the electric charge is current, expressed in Amperes (A).
The force that enables the electric charge to move, or the potential energy is voltage, expressed in volts (v).
In the circuit, there is bound to be some “friction” that resists the movement of electric charge, and that is resistance, expressed in Ohms (Ω).
Resistors are essential in every circuit. They limit the flow of current in your circuit so hopefully there are no burnt components.
Types of resistors
For generic resistors, there is generally two types of resistors: Carbon Composite Resistor or Film Type Resistor. Carbon resistors are popular due to their extremely low cost and good accurancy with low enough tolerance (usually about +- 5%). Flim Type Resistor, while being slightly costlier, provide closer tolerances (up to +-1%) from the rated resistance.
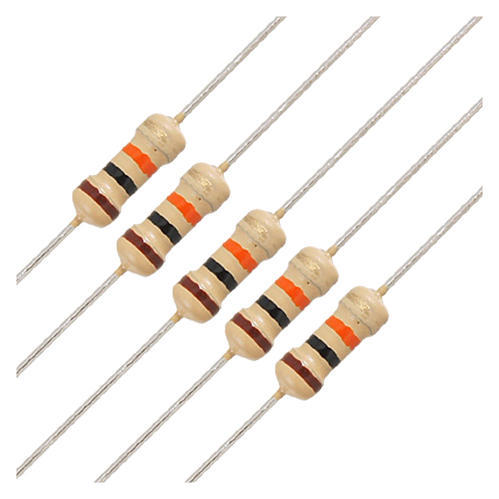
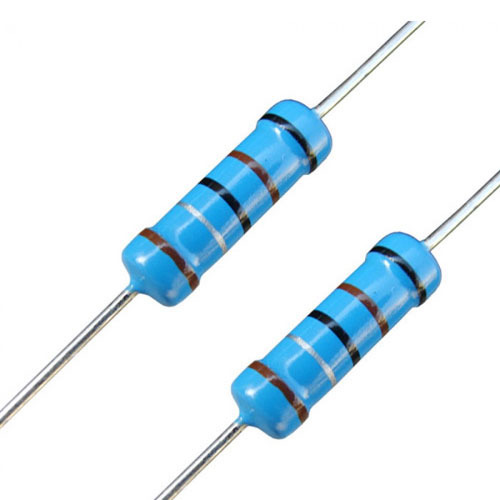
Carbon Film Resistors (left) and metal oxide resistors (right).
The resistors provided in the kit is metal oxide resistors and have values of 330 Ohm and 10K Ohm. You can read the values of the resistor from the colour band on the component.
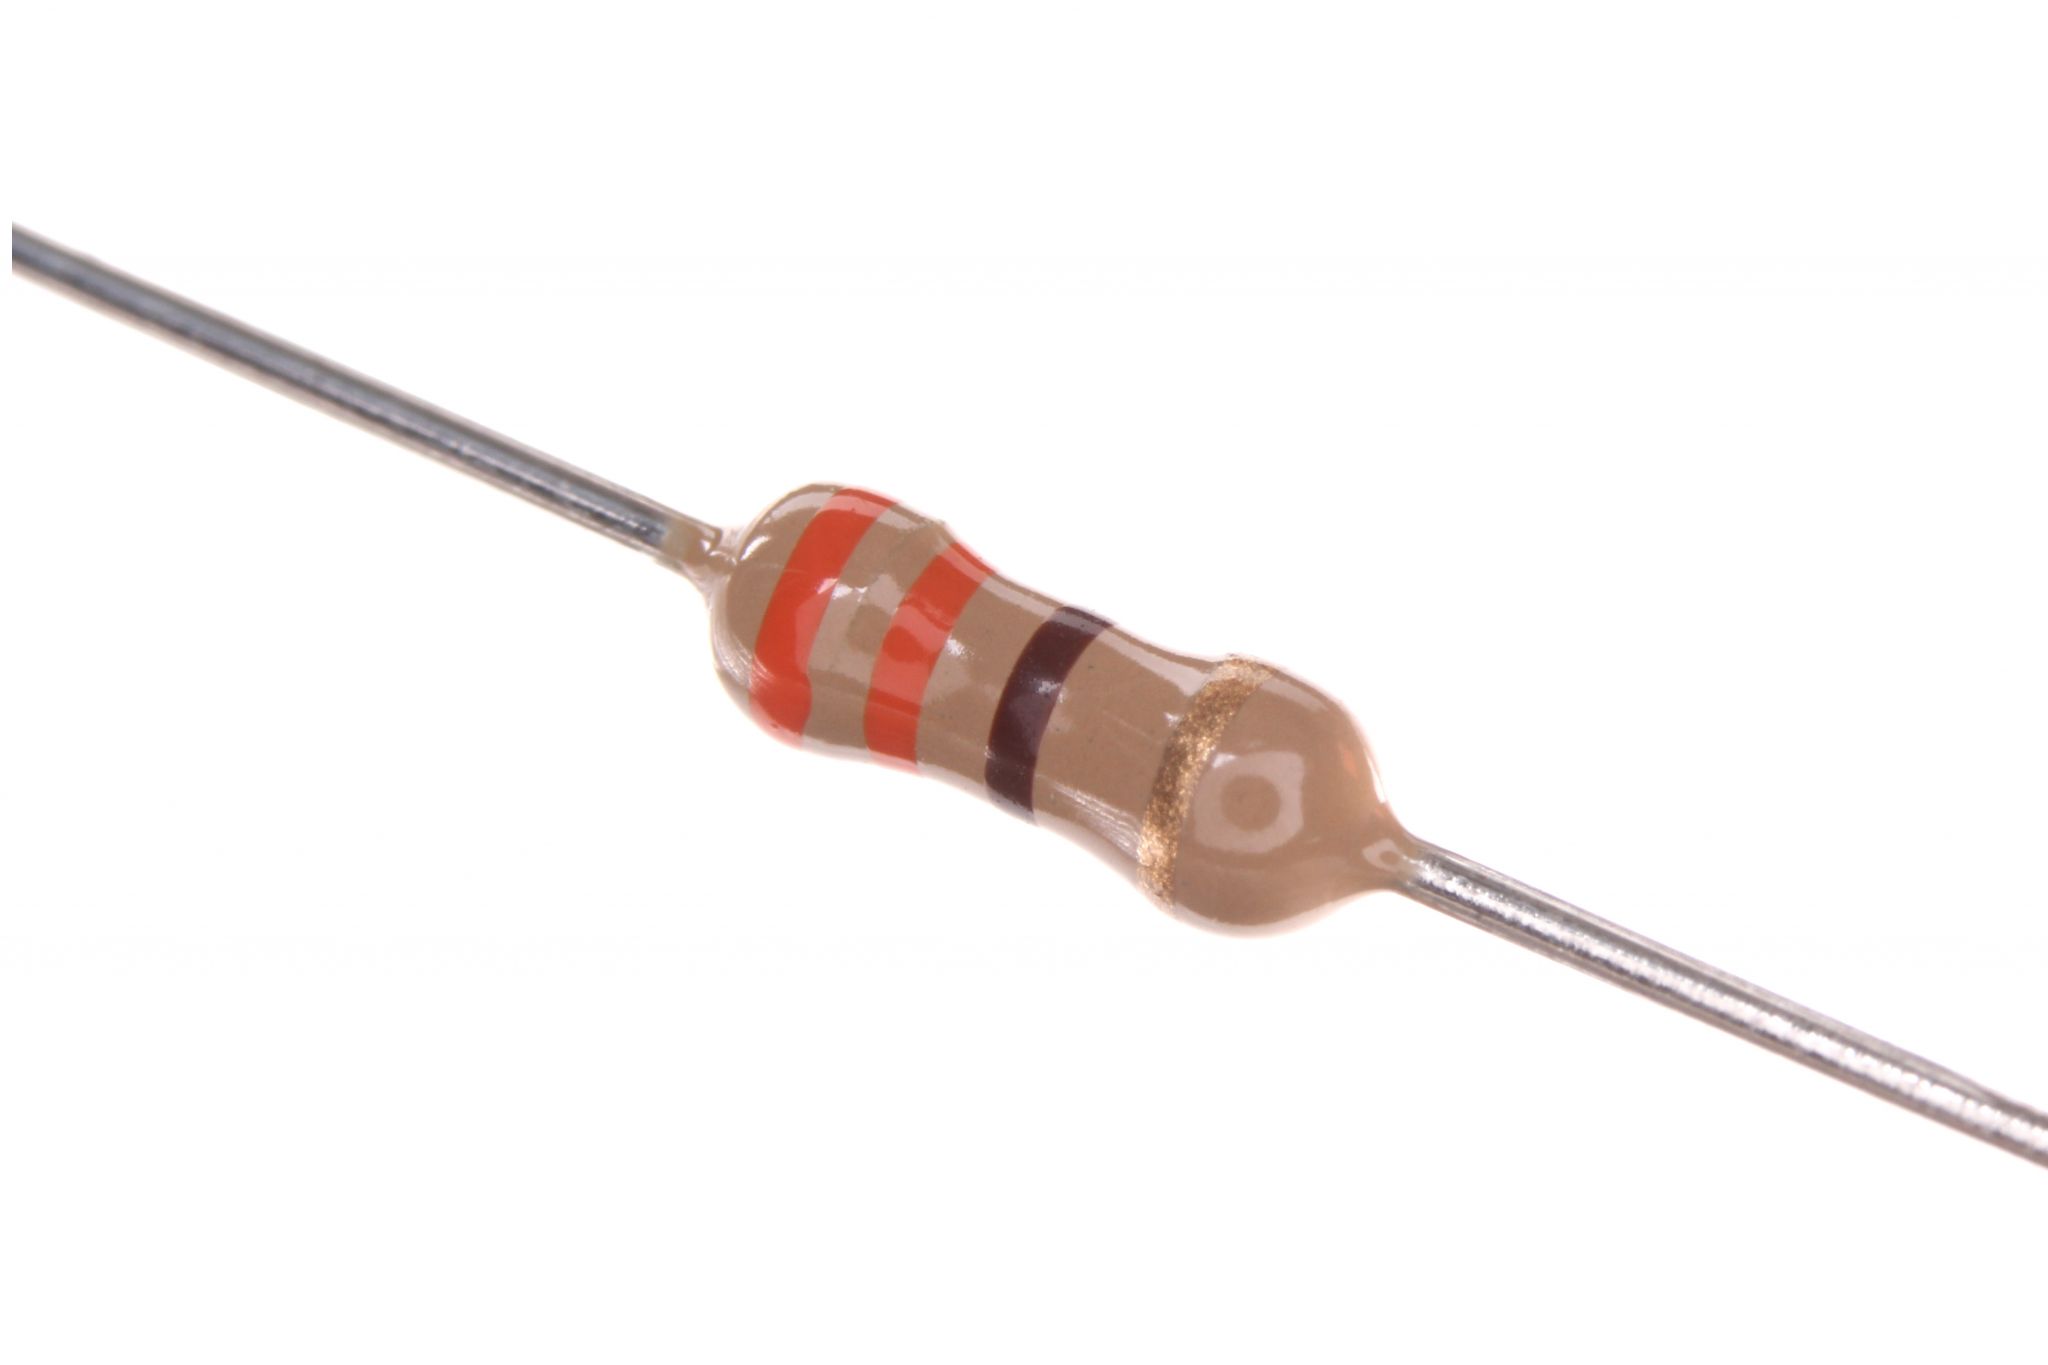
This is a 330 Ohm resistor.
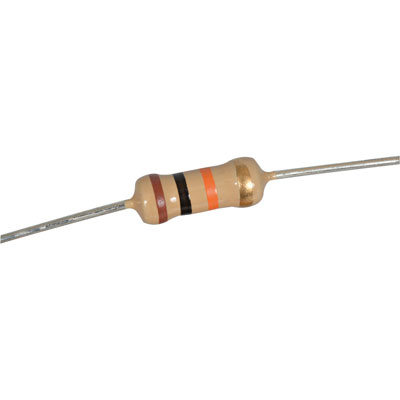
This is a 10K Ohm resistor.
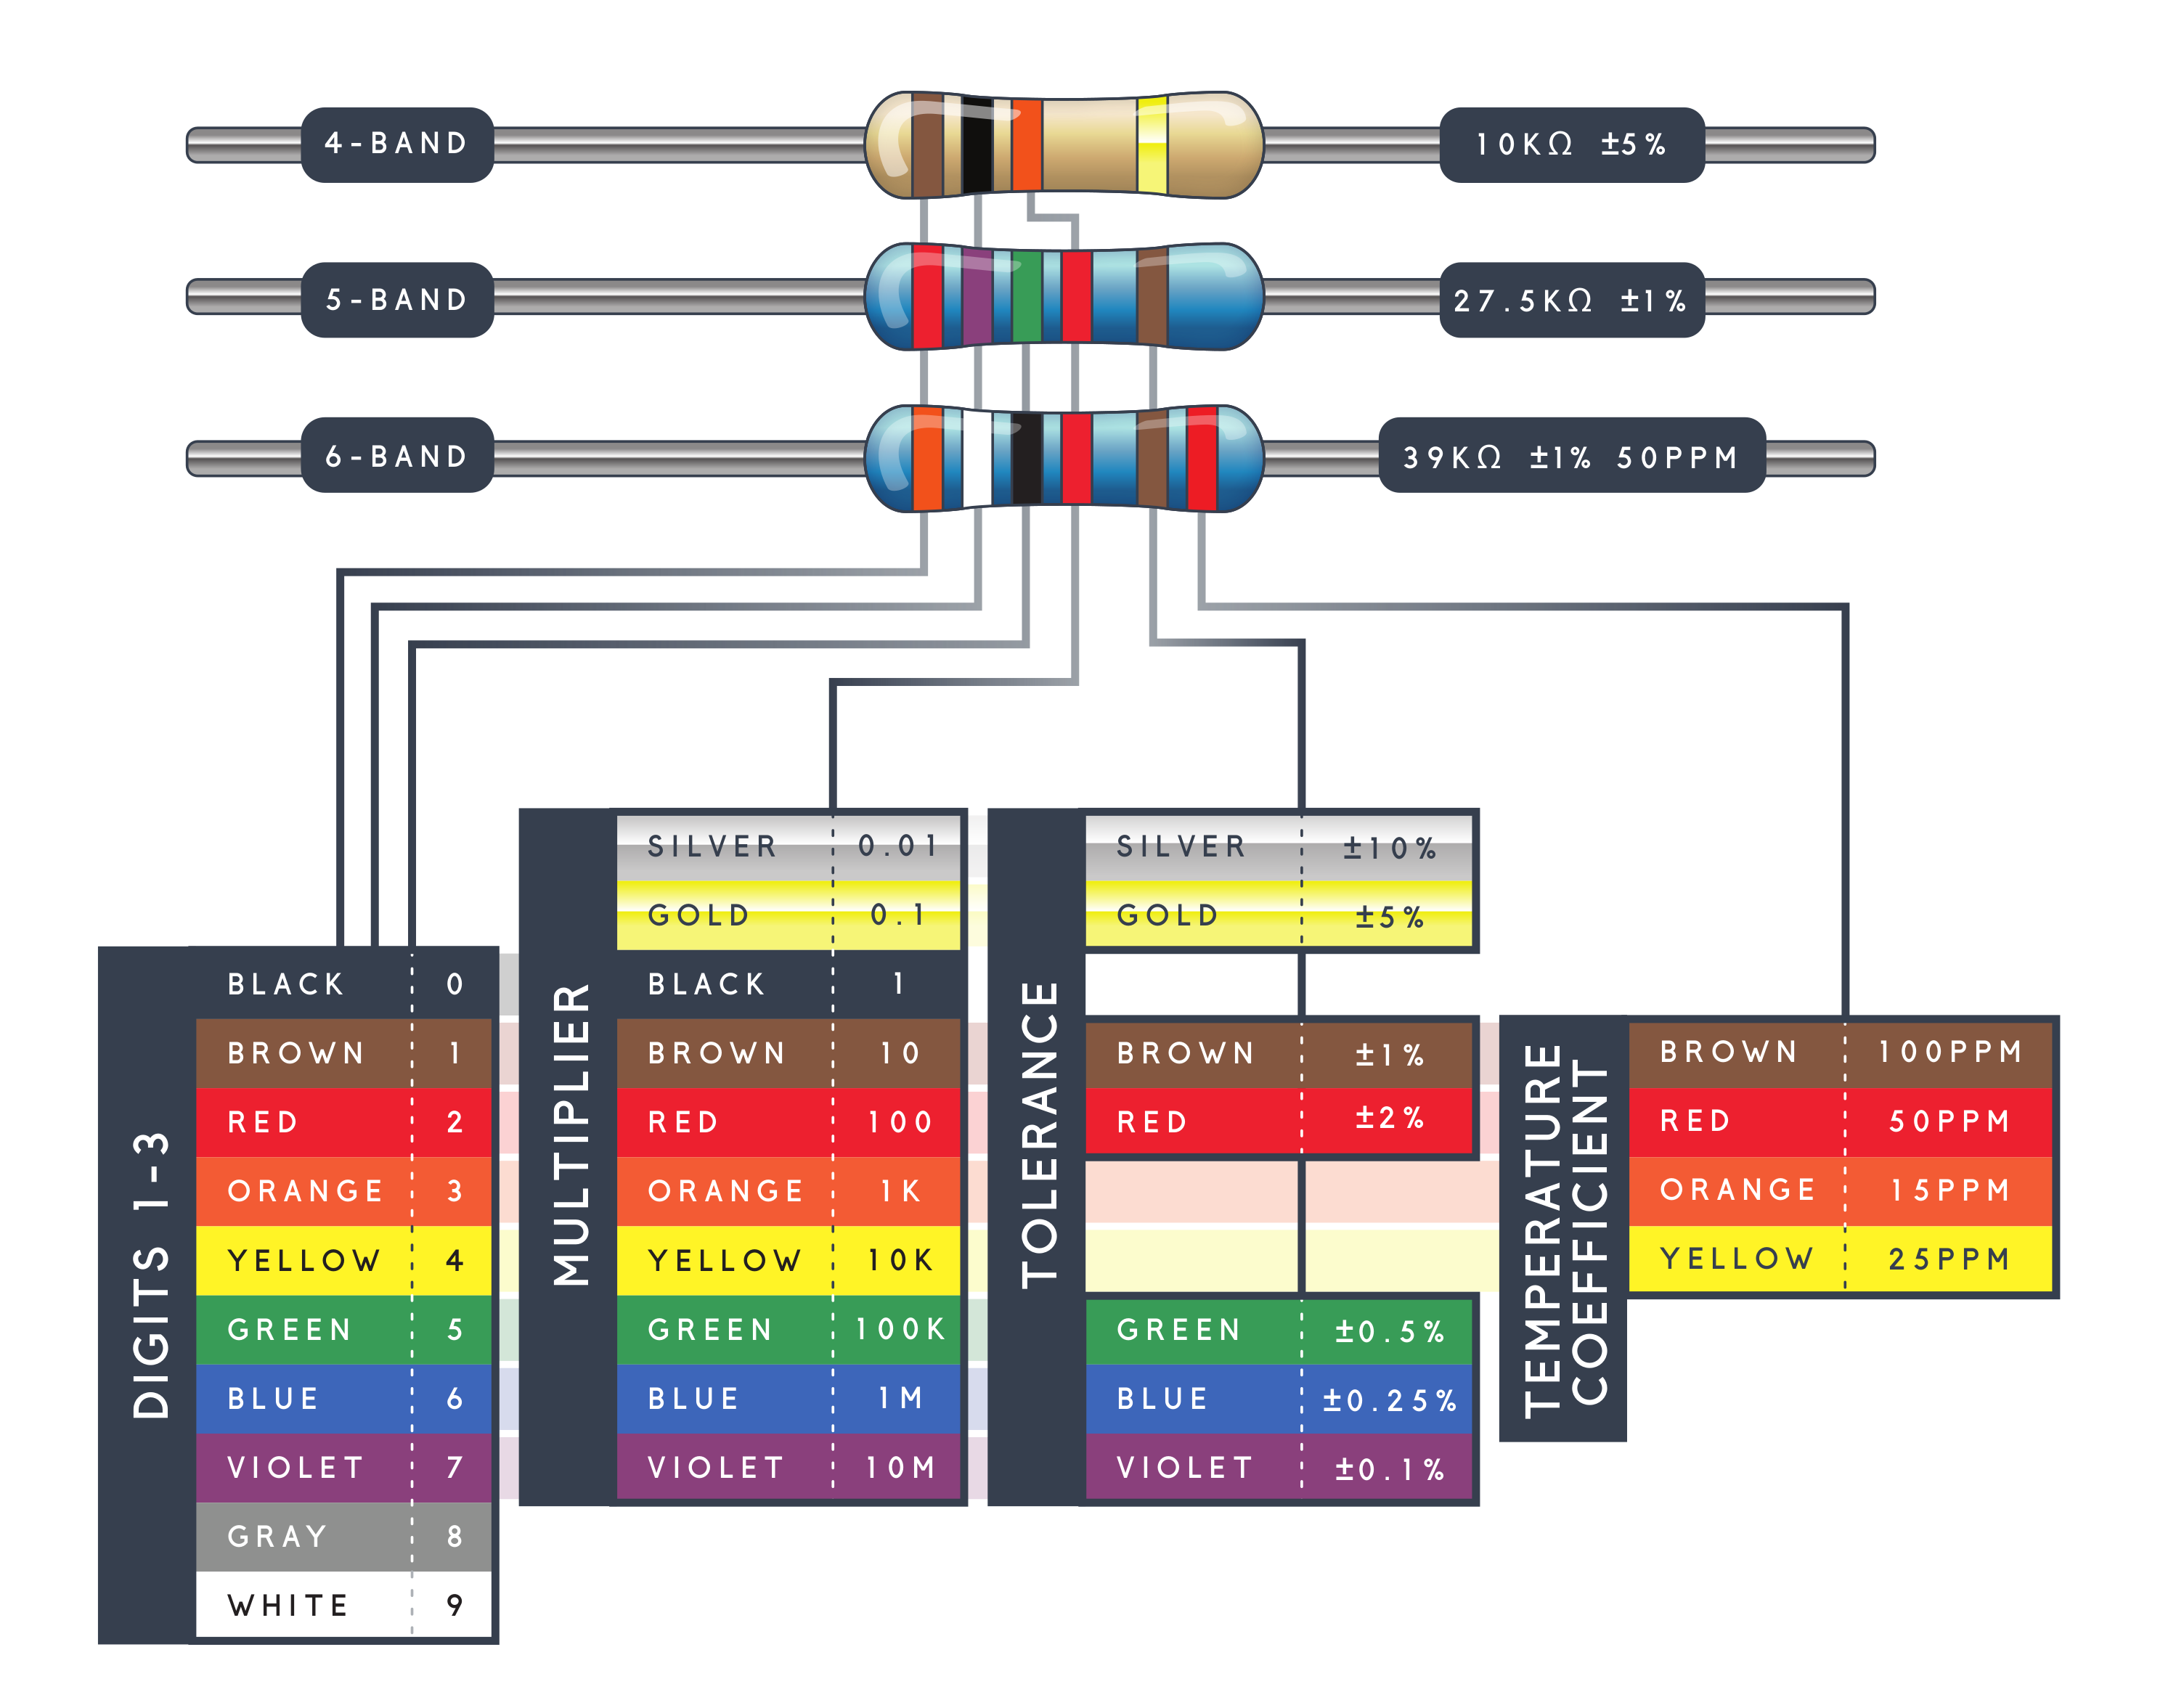
If you are wondering how to read the values of resistors, refer to the infograpic below:
Light Emitting Diode (LED)
Somehow or another, you would realise that you would need something to light up! Say hello to the LED! LEDs are small, efficient lightbulbs (that are rather bright). They are found in a large variety of devices like mobile phones, computer screens, the headlamps of the car and even spotlights!
So, you might be wondering how should you place an LED in a circuit? Here are the 3 most important things to take note:
Polarity is important
As LEDs are essentially diodes, it will only allow current flow in one direction. This is why if you take a look at your SSTuino Innovator’s Kit, you would realised that your LEDs have legs that are of different lenghths. Does the different lengths of legs indicate manufacturing defect? On the contary, the legs are specifically manufactured like this so that the you can identify the polarity of the LED easily.
The longer leg of the LED is the positive leg and is called the anode. The shorter leg of the LED is the negative leg and is the cathode.
But what if you just nice happen to connect it the wrong way? Would it explode?
The LED would not light up, so not to worry. You can just simply reverse the polarity of the LED (i.e flip the thing around) and it will work again!
More current = More light!
As the LED is brighter (with the same voltage applied), the current draw would be higher. If you happen to purchase super-bright LEDs, you would realise that they drain your battery easily. With this, you can change the brightness of the LED by adjusting the amount of current that goes through it.
BOOM!
As with most electronics, there is always a limit to everything. Once an LED draws current beyond a certain limit, you can see the colour change and then… it dies. RIP.
So to prevent tragic things like this from happening, we introduce resistors into the circuit to limit the amount of current the LED can draw. But what resistor would be most suitable?
Some simple circuit theory…
Let us assume that we have some LEDs, resistors and a power source. Without any knowledge about datasheets and calculation, how should we go about connecting them together?
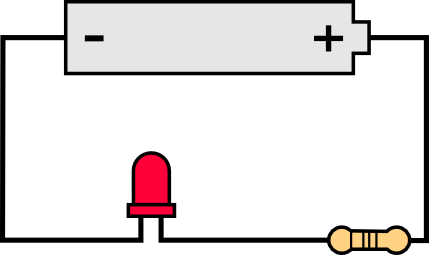
It is that simple.
Moreover, a good resistor value for LEDs is 330Ohms (can be more or less), so we can simply use this resistor. Easy, right?
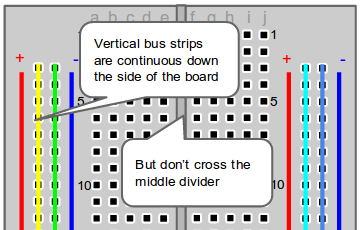
Breadboard
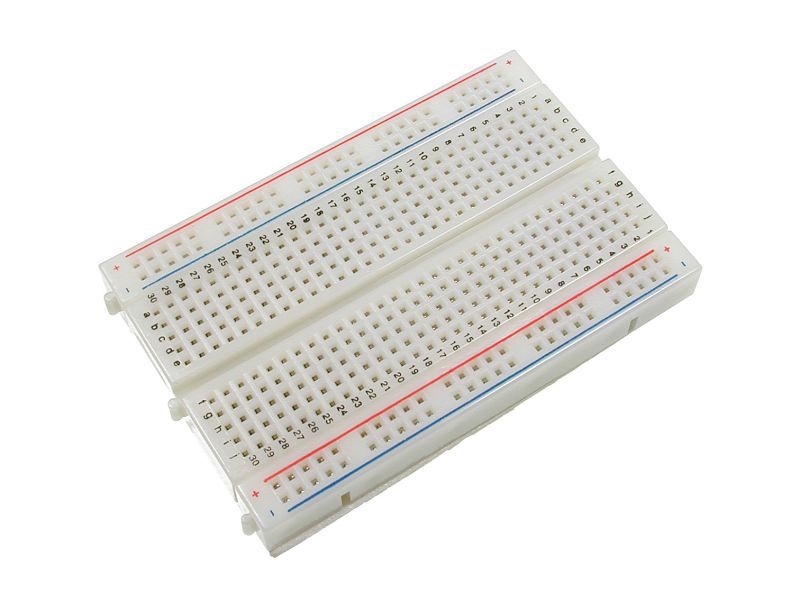
So you happened to see a retangular shaped block with holes in it and wondered what it was? This block is called a breadboard or prototyping board. The breadboard is a very important part of your prototype when you develop new things!
In your ICT lessons, your teacher would go through with you on how to connect up your circuit. Moreover, you would be using TinkerCAD to simulate and view your virtual circuit before actually building it, preventing any (touch wood) magic smoke.
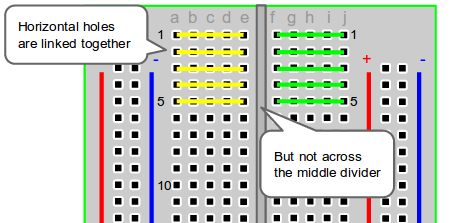
The layout of the breadboard is done such that you can assemble your circuits easily.
Wires
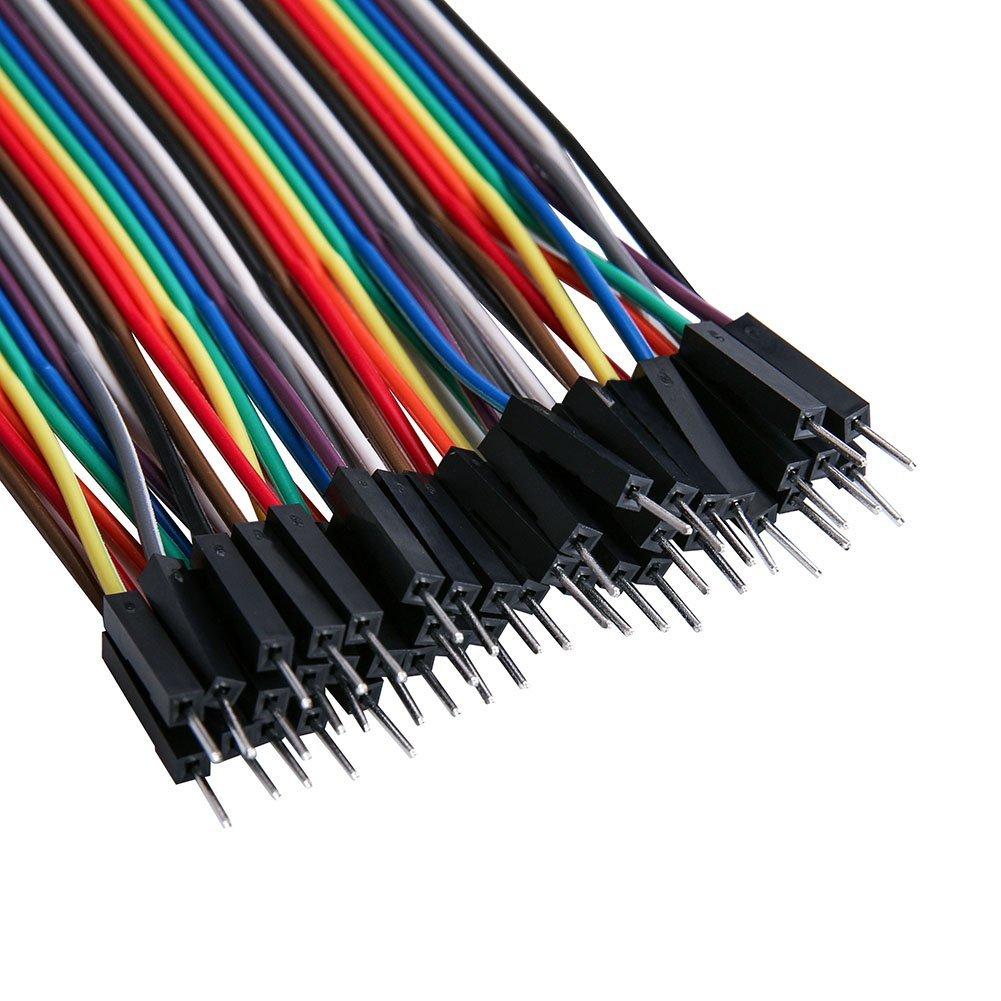
Wires are the most important part of your circuit. Without them, you would not be able to have electricity flowing through your circuit as there is simply nothing connecting them together! The wires provided in the kit are Male - Male Dupont wires (I dont think I have to explain why the ends of the wire is male, right? wink), and are the right size for you to be able to connect from your SSTuino to the breadboard or the component.
Push Button
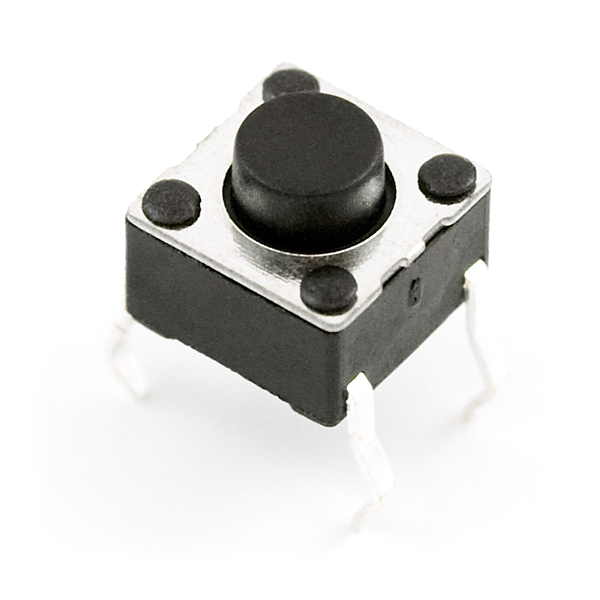
This push button is a very simple example of a switch. But before you connect this push button into your house’s mains, please do not do so :). The push button is meant for the breadboard instead.
When the push button is pressed down, the circuit is closed and current would flow through the two terminals of the button. Likewise, when the push button is not pressed down, the circuit will be open and current would not flow through the two terminals of the button. One good example would be your Macbook keyboard. As you depress the key, the circuit is closed and the computer can detect wether the key is pressed down or not
Light Dependant Resistor
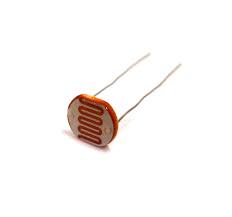
As the name suggests, the Light Depedant Resistor (or Photoresistor) is a component that changes resistance when the light intensity changes. For the LDR that is provided in the kit, the resistance of the LDR decreases when the light intensity increases.
Like a normal resistor, there is no polarity for the LDR and can be connected in both sides.
Buzzer
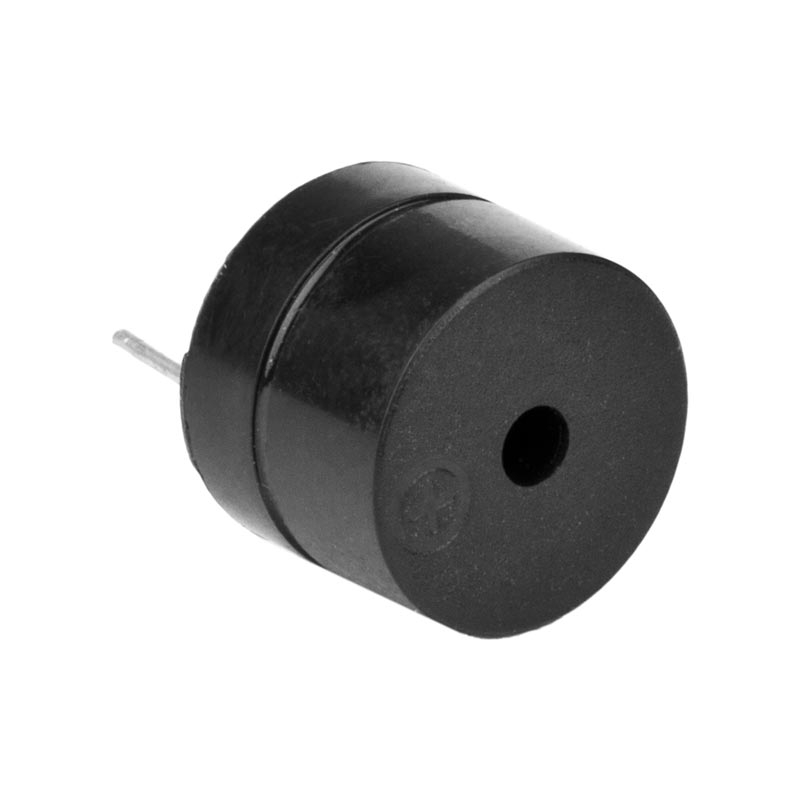
This buzzer is a Piezo Buzzer. If you try to open up the buzzer, you would see that there are a few embedded components inside the buzzer. What happens when you connect it to power is that it is converted to an oscilating signal, which is amplified and applied to the piezo disc. This causes the material to expand and contract rapidly, which results in sound waves being produced.
Note: The sound from the Piezo buzzer can be quite sharp and loud. Do be careful when using these components.
Potentiometer

The potentiometer is a variable resistor, with a adjustable knob. As the knob is turned from one side to another, the resistance changes. Potentiometers are used for controlling devices, such as the brightness of the LED, and with the appropriate circuit, the speed of a motor.
Ultrasonic Sensor
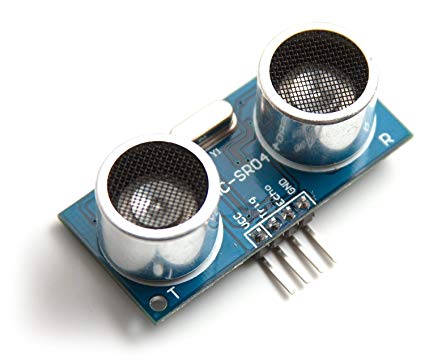
The ultrasonic sensor is a device that measures distance by emitting ultrasonic waves, waits for the wave the bounce back and then measure the time taken.
TMP36 Temperature Sensor
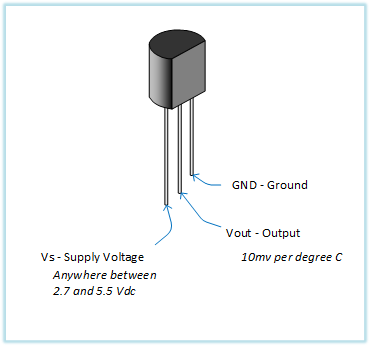
The TMP36 temperature sensor is a rather accurate sensor despite is low price. For more information, visit the Adafruit Website.
Note: You may notice that this package may resemble that of other components such as transistors. Please do not mix them up and read the respective manuals carefully. The component model would be marked out on the flat side of the component for this package. Use the model number to search for the pinouts for you to make sure you are connecting the component the right way.
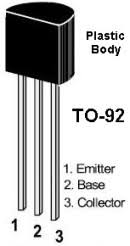
This shape and pinouts is called the TO-92 Package and is a very cheap and easy to manufacture method for transistors.
PIR - Passive Infra-Red Sensor
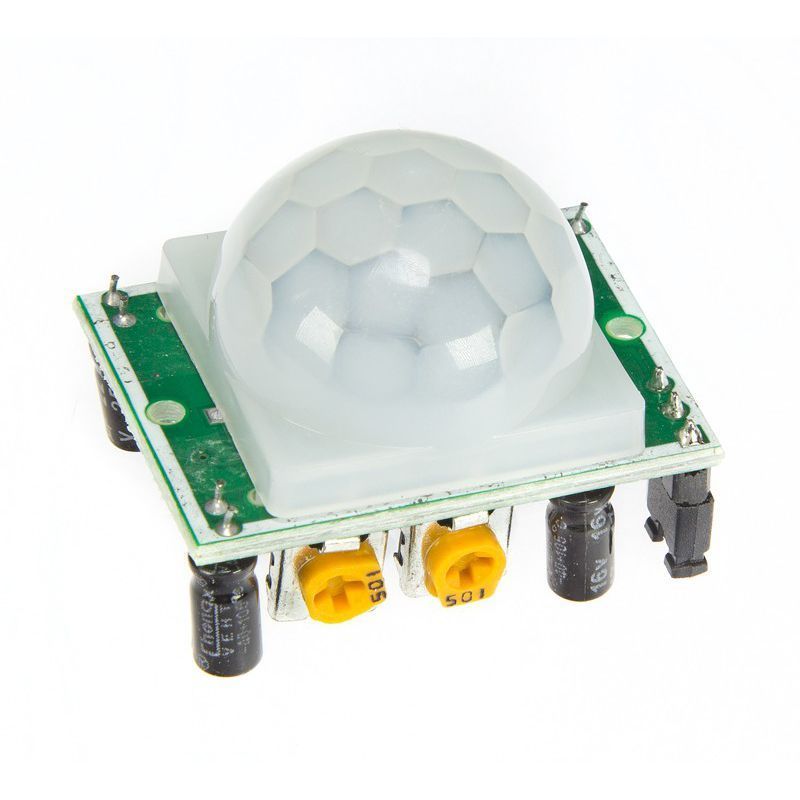
PIR sensors are low-power, inexpensive and easy to deploy devices that detect if a person is in range of the sensor. A common use would be the light sensor installed in toilets that automatically turns on the lights when someone steps into the toilet.
To find out more about how it works, check out this detailed explanation from Adafruit: https://learn.adafruit.com/pir-passive-infrared-proximity-motion-sensor/how-pirs-work
DHT11 Temperature and Humidity Sensor

The DHT11 Temperaure and Humidity sensor is an excellent hobbyist sensor, albeit with low refresh rates. It is also cheap to purchase and has relatively good accuracy for basic data logging. The data from the sensor can also be easily read from any microcontroller.
9g Micro Servo
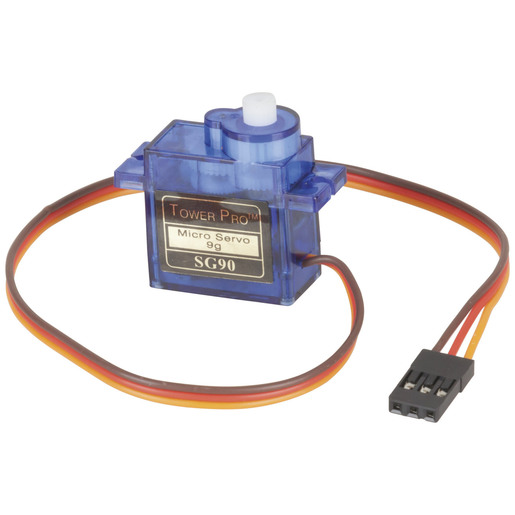
This Micro Servo has a lot of cool uses! Being a servo, it has precise control from 0 to 180º and is a very good component for prototyping.
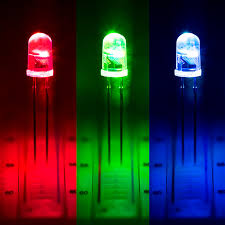
RGB LED (Common Cathode)
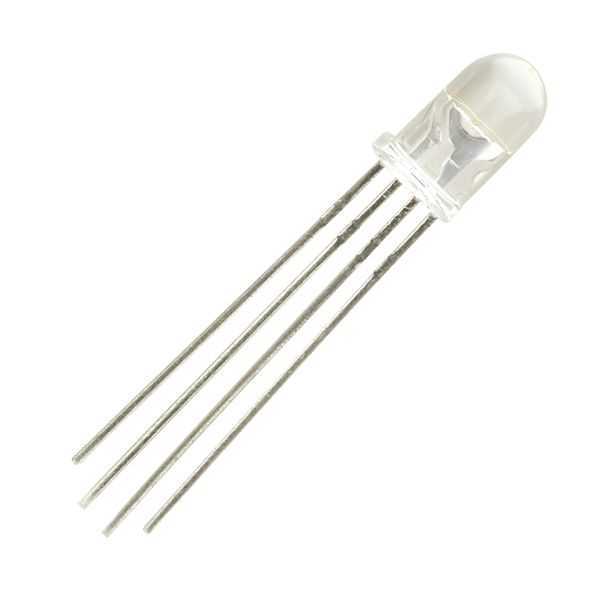
The RGB LED is a more complex version of the conventional coloured LED. It combines 3 LEDs (Red, Green and Blue) into one package. By configuring the intensity of the various LEDs, you can create lots of different colours from this LED.
Last but not least
This tutorial is meant for you to know that with every component that you use, you will need to decide for yourself wether it fits the circuit or not; be it simple components like LEDs and buzzers to more advanced (and more expensive) components like LCD displays and sensors!
One thing that is great when you explore the Arduino ecosystem is the immense amount of community support. When in doubt, always ask. As an individual learning 21st century digital skills, there are lots of platforms where your queries can be answered. It is just a matter of wether you would want to go and find the correct resources or not.
Therefore, before giving up on your design, maybe consider:
- Refering to your component manual. They will include essential infomation about the properties of the component
- Google the issue. Usually people would have posted this issue online in places like forums (StackOverflow, Arduino forum, Reddit etc.)
- Ask around about that issue. You can also post your questions in the appropriate channels, and if the question is good, others can learn from the issues that you faced!
If you would like to know more about: